File Bending – An Essential Endodontic Skill
The popularity of nickel titanium engine driven Rotary instrumentation has had one unfortunate byproduct: Graduate students are becoming much less skilled in the art and science of bending hand files to negotiate difficult or ledged canal systems. Ask any experienced endodontist and they will tell you that negotiation of difficult, ledged, calcified or previously treated cases is the essence of the specialty. Knowing how to bend files and manipulate them by hand is the key to negotiating instruments to the apex, which is the ultimate goal of endodontic treatment. As flexible as these new Ni-Ti Rotary engine driven instruments maybe, improper use of them can induce a ledge at the tip, which pretty much makes it impossible to perform optimal treatment and obturation.
The first thing that you must learn when doing endodontics is how to bend files appropriately. The general rule is: the greater the obstruction, the tighter and sharper the bend must be on the end of the instrument. The instrument bend must be placed as close as possible to the end of the instrument and must NOT be angular. Placing an angular band on a small file makes the instrument predisposed buckle or fracture at the angle of the bend. Fracturing the last millimeter or two of a size .08 or .10 file in more difficult canals is one of the most common reasons for lack of ability to get to the terminus.
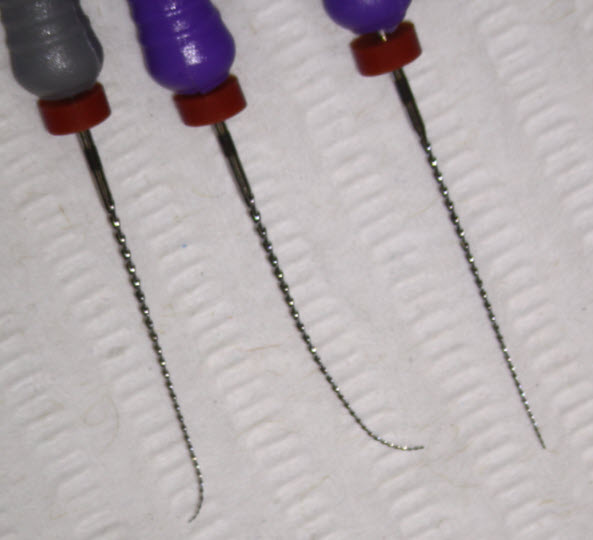
Figure 1: File bends – #10 File
File on left is the most common type used for curved canals. In obstructed canals the “J” is much smaller and closer to the tip. The more difficult the obstruction, the smaller and tighter the bend placed on the end of the instrument.
Using the middle and right instruments often lead to ledgeing.
There are several commercially available instruments (such as the B Bender) that can be used to apply these bends, however most of us use a pair of cotton pliers or in certain cases a small Nail Clipper (whose edges have been dulled to prevent cutting of the instrument – thanks to Dr. Gary Carr for that tip) is used to create these sharp bends. The bend can be most accurately described as a “J”.
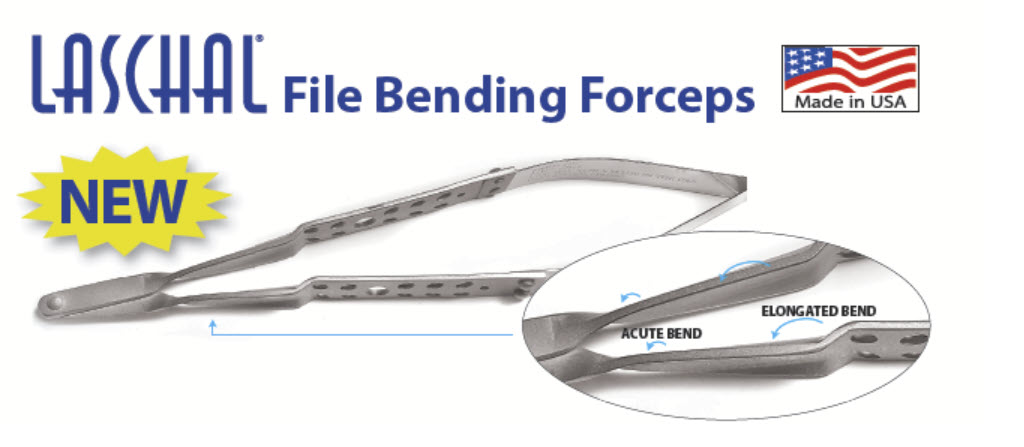
Figure 2 Laschal Bending tool
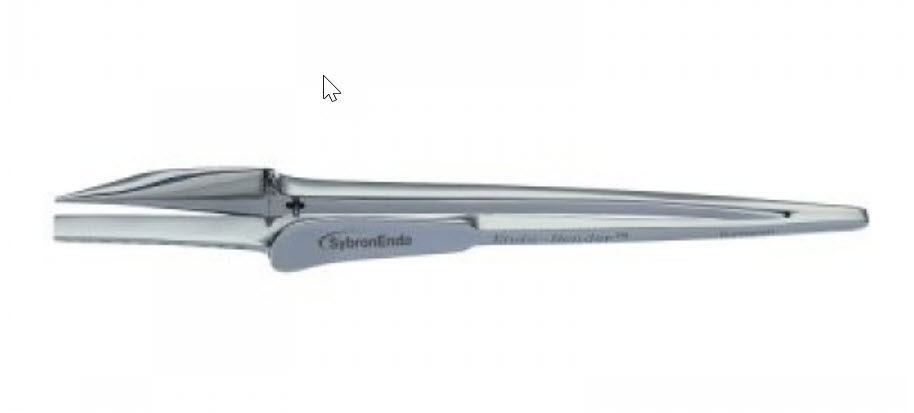
Figure 3 : Endobender by Kerr Sybron (Buchanan design)
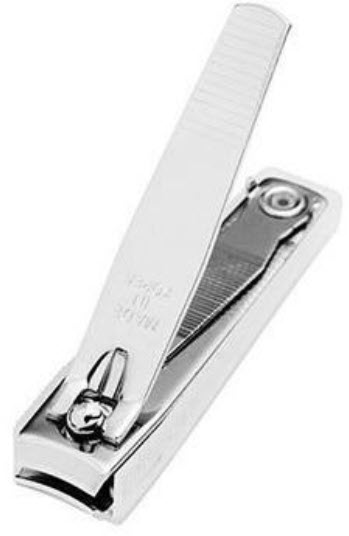
Figure 4: Nail clippers
Edges are dulled to prevent cutting of file during bending
Once an obstruction is encountered by any file , the instrument is immediately removed. No effort should be made to power through the obstruction because this is most likely would cause further ledging or jamming of canal debris into the more apical portion of the canal. The canal should be immediately irrigated, and the smallest size file should be selected with the approximate working length marked with a stop. Close examination of conventional and cbCT imaging should be performed at this point to ascertain the size and direction of the prospective canal. The instrument is bent by placing a small sharp band at the end of the file as described above. The greater the obstruction or ledge, the closer to 90 degrees the “J” bend will need to be in order to negotiate it. Close observation of the file must be done as it is inserted into the canal. The file is used like an antenna, rotated very slightly and withdrawn in the event it encounters resistance. It is used in a probing motion, in very small increments until you feel the file drop into and pass the obstruction. This is the critical point. The file is then used in a strictly up and down ( in and out motion – NO rotation) in order to attempt to clear a path through the obstruction or debris. There is very little true “filing” that is being done at this point. These small files are essentially “space makers” in the collagen and pulp tissue that allow irrigants to go deeper and pave the way for larger files.
Invariably, this small file will be pulled out too far from the canal, catch on the ledge, and either fold, unwind , deform or lose its bend. You will be unable to insert it as before. The file should be removed at this point, examined for bends, kinks or deformation and discarded as necessary. The new same size file is then selected again and an exact bend corresponding to the first instrument is placed and the procedure is repeated. Constant irrigation is essential. The file will eventually clear some space and it is sometimes necessary to instrument slightly past the apex with very small files in order to create sufficient space for the subsequent instrument. Once the instrument is loose, the next size instrument is selected, and the procedure is repeated. Invariably there are going to be situations in which selection of the subsequent instrument and placement of the exact bend does not result in negotiation of the ledge. That simply means the prior instrument was not worked sufficiently and you must go back and do more work with that instrument. This procedure is repeated with instruments size .06 – .15 until such time has a reliable path can be reproduced.
(Some clinicians have recommended making “1/2 file sizes” by cutting the end of a # 10 to make it a # 12 tip. I do not recommend this because cutting a file produces a flat sharp tip – not desirable for this purpose.)
Depending on the extent of the obstruction, as many as a dozen or more files may need to be used in this manner. In certain situations (where very sharp bands are present or where ledges are extreme) it may NEVER be possible for engine driven nickel titanium Rotary instruments to negotiate the exact curvature that you have managed to obtain with your hand instruments. At that point , the engine driven instrumentation will need to be used short of the level of blockage or ledge, and hand instrumentation be used to maintain patency of the final curvature. With such cases it is best to use a warm thermoplastic obturation technique (such as vertical compaction of warm gutta percha) in order to try to get the material to flow around the bend or ledge.
Under no circumstances should any instruments be used forcefully in an apical direction, either with hand instrumentation or with nickel titanium engine driven Rotary instruments. This is a recipe for perforation. Should this happen, the canal invariably will fill with blood and the perforation will be apparent . Although the radiographic appearance of the obturation may show the material at the “radiographic terminus”, essentially what you have done is created an aberrant canal that does not correspond to the actual foramen. The original canal was not followed, and a new canal was made. Such cases are sometimes symptomatic and may require surgical intervention with root resection and retrograde fillings.
One frequent mistake that I often see from my referring dentists is the referral to the tooth is having a “calcified apex”. Common sense dictates that this is a ridiculous assertion. With very rare exceptions (such as a tooth with heavy abfraction lesions or class 5 restorations). Calcification of the canal system occurs coronally-apically. The last part of the tooth to become calcified is the apex!!!!! That is why we occasionally see traumatized teeth with obliterated chambers/canals and minimal canal contents but that have periapical radiolucent findings associated with the apices. If a pulp has been diagnosed as vital with pulp tests, it is impossible for the apex to be calcified because the more coronal tissues would have no vasculature!! What has happened is that (a) the clinician cannot negotiate the anatomy as described with above technique or (b) the instrumentation has resulted in a ledge or obstruction and the clinician is using the excuse that the canal is “calcified” as an excuse for being unable to negotiate the apex .
Ask any Endodontist and they will tell you that this is a frequent reason for referral. In the best-case scenario, the referring dentist immediately stops after realizing that they cannot negotiate the canal and refers the case out immediately. In the worst-case scenario, the clinician continues to try to negotiate the canal producing more deviation/transportation of the natural canal, a much larger ledge and making the case much more difficult to negotiate then it needs to be. When the case is finally referred, in some cases the cases it is ledged so badly that the original canal cannot be negotiated and obturation must be performed short of the terminus. Where there are no symptoms periapical radiolucent findings or pathology, the chances are fairly good that the tooth will remain asymptomatic. In the case where periapical radiolucent findings or pathology are present, it is possible that the area will not heal or that further surgical procedures will be necessary to deal with the unfilled canal system.
To summarize, if you are not willing to take the time and learn how to bend files properly, it is frequently in your patient’s best interest to have you refer the case out for treatment. Should you find yourself in a situation where the canal is obstructed, immediately stop what you were doing and refer the case before it becomes worse. Continuing to try to force instruments or to use unbent files or engine driven Rotary instrumentation can only lead to possible ledge formation, broken files, or outright perforation.
